


If you’re looking to add color, energy, or some flair to your room, LED strips are a great choice. These threads have large cutable rolls that make their installation and adjustment very simple. In this article, we are looking for the answer to the question of how to install LED strings?
Find out more with Chique lighting.
A successful LED string installation requires only a little planning at first. For example, you need to make sure that your wires are compatible with the power supply. Then, you can connect the LED strands with purchased connectors or by soldering. Connections are easier to use. But soldering is a better and more permanent option for connecting LED strips and strings. Soldering is recommended, especially if you are installing these wires outdoors. You can also easily install the LEDs by sticking them through the adhesive on the back. Finally, plug them in to enjoy the light they create. In the following, we will explain the four important steps in the process of installing the LED string.
Selection of thread and food sources
Measure the area where you plan to install the LED strip lights. Estimate the amount of LED brightness you need. This will help you choose the right thread. First of all, you should be able to estimate the required lighting of the environment. For this, you can refer to the article on the importance of color and brightness of LED strings .
Schedule the installation before anything else. Try to make a plan of the area. Be mindful of where you place the wires and any adjacent outlets you may connect to them.
Be sure to calculate the distance between the nearest outlet and the location of the LED light. Use extra length or a stretcher wire to fill the gap if necessary.
Get the appropriate LED strips and accessories.
Check the LEDs to see what kind of voltage they require. If you buy it online, look at the product label on the LED strips or on the website. The threads are either low voltage or high voltage . Low voltage cords are suitable in most places and use less energy. However, high voltage filaments are more versatile, brighter, and longer in length. To keep them on for a long time, you must have a suitable power supply. If you plan to use multiple strands or cut the LEDs into smaller strips, you can generally wire them all to the same power supply.
Installation of LED strings and power supplies
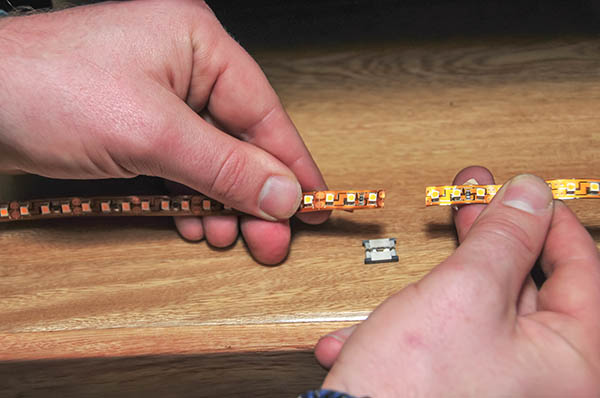
If you need to connect multiple threads, use quick plug connections. The clip connectors are placed on the copper points at the end of the LED string. These points are labeled with a positive or negative sign. Position the clamp so that the correct wire is on each point. Place the red wire on the point marked as positive (+) and the black wire on the point marked as negative (-).
Connect the LED to your power supply with the quick connect. Your power supply has a long cable with a plug at the end. LED filaments also have a similar adapter at one end. The power adapter is connected to one of the LED threads. If you disconnect the LED plug, you can buy another quick connector that attaches to the end of the strip.
You can know: The meaning of words in LED lighting
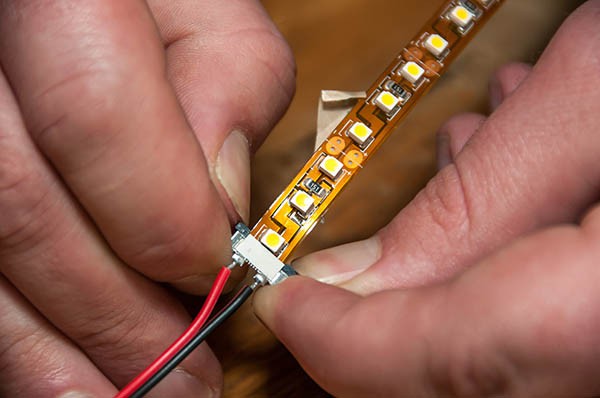
Although you have to buy these fittings, setting up modern LEDs is simple. These connectors are very useful for connecting LED strings or power supplies.
If you don’t have the right connectors or don’t want to use any connectors, you can solder the wires together.
Solder the LED strands together
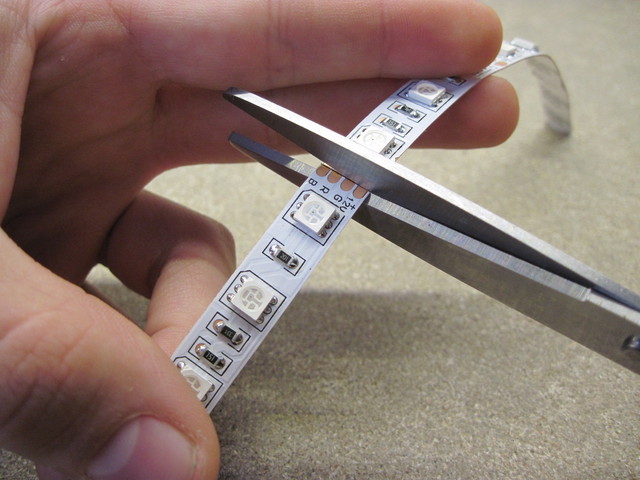
Select the red and black power wires to connect to the thread. LED strips usually have 2 contacts, each of which requires a separate wire. Try to use wires with a diameter of 0.064 to 0.102 cm. Get separate black and red wires for each LED you want to connect. If you solder the connector to the wire, check the connector first to check the connected wires. Some LED strings use up to 4 wires. 24V types often use red, blue, green, and yellow wires instead of red and black. You can identify these wires by looking at the labeled copper dots on the LEDs. Note that the color and size of the wiring used may be slightly different depending on where you live. However, the black and red wires are usually used for power.
Read more: halogen vs LED lamps
Another important point is that you need to determine the maximum power consumption of the LED strings. Each LED filament consumes a certain amount of watts or electricity. It depends on the length of the thread. Check the product label to see how many watts per foot (0.30 m) it uses. Then, multiply the watts by the total length you plan to install. The result tells you how strong your power supply needs to be to keep the LEDs on. Since LEDs may use a little more than you anticipate, add 20% more to the amount you get and consider that as your minimum.
Placement of sticky LEDs
Wash the LED installation area with warm water, then dry it. Dampen a clean cloth in warm water, then rub the surface to remove the particles. Any contaminants can prevent the LEDs from sticking, so clean the surface thoroughly to make sure it’s free of dirt and debris.
Remove the remaining moisture with a dry and clean cloth or allow the surface to air dry for 30 minutes. Remove smudges by dampening your cloth in isopropyl alcohol. You can also combine equal amounts of warm water and white vinegar for an alternative cleaner. You can also use a special cleaner for different surfaces. For example, get a wood cleaner to clean wood surfaces well.
Take a Look at Chique lighting shop to buy the best LED products.
Peel off the adhesive backing and press the LEDs into place. LED strips are like stickers. So wait until they are ready before you pull the back. Then, place them on the wall. It is better to do this once in a while.
Start at one end of the surface and remove the back of the primary thread. Place it, press it with a flat hand. Then continue placing the rest of the thread. Take the time to make sure the LEDs are in the right place so you don’t have to move them around later.
If the threads do not stick to the surface, you may need to clean it again. Otherwise, you can get mounting tape, duct tape, mounting clips, or other means to hold the threads in place.
Source of images: tome2.com | ebay.com